poniedziałek, 9 listopada 2015

Malifaux in color

I've finished few models apart from my dear Maggot Maggie. My first crew is almost finished and based.. It actually played first 3 games (although in various states of being unfinished).

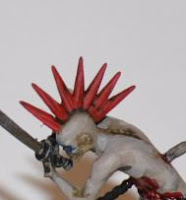
So here are 3 Zombie samurai.. Those are very strange zombie, punk and samurai combos that i cant find a good justification.. but they are great summons for my master Nicodem :)

And Nicodem himself with Maggie and his trusty zombie dog:

here is family photo of everything painted so far:

And photo of shamfully unfinished things..

And photos from my first game against Nicodem nemesis green and vile and fake-tited  Ophelia the frog gremlin:

And her fake-frog-tities loving henchman..


That culminated in shooting standoff with Nicodem on the old abandoned cemetery :)
(Yesssssssssss I need to finish the base on the plants)

Lastly a photo of my first table to show you unfinished Asian Inn I am slowly building..
(to show some progress on the next report I will post )

piątek, 6 listopada 2015

Fast cheap and dirty: Wooden fences for free and in 10 minuts

If you know me you know that I don't like terrain making. I have great ideas but i fail to finish most of them, and they lay everywhere for ages pissing off my dear wife.. That why i love when i can do something fast, cheap and make it look cool during the process.

So here are my How to make you wooden fence in easy steps.
Those are needed components. A coffee sticks (i salvaged mine from IKEA and Starbucks (but they can be bought in bulk. They are main component of build. Base will be ice cream stick - best kind are from magnum or similar posh ice cream as they give better stability. Last component required are 5 matches.
First you have to decide on fence heights, in this example I went for 30 mm of height. I built 40mm sections earlier, 50 mm shouldn't be any problem.You may reconsider the method and materials with smaller fences as it will star to look dodgy with anything smaller than 25mm cm.
I marked 30mm section on my coffee stick.
Then you have to make a supporting pieces. They are very important so you have to decide how long they should be. Best length is a 2mm shorter than whole fence section (for ease of lining them on the table and making corners. At this stage you need to decide on length of the whole section. As I went with ice cream sticks for bases I wanted it to be around 100mm long.  Its worth to mention that fence itself should be a little longer than base itself (again for ease for stacking and making corners).
Then you have to gently cut a coffee stick in half..
Then its time to cut the boards themselves we marked earlier.

I used the scissors instead of exacto knife for two reasons. First its much faster, secondly t makes some of the little boards rough. Remove any splinters for worn out look. If you want very new fence use exacto knife for precise cuts.
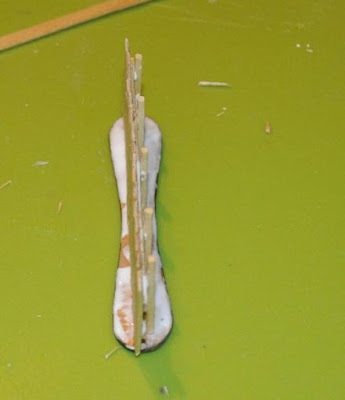
Then its time to dry fit everything and make supports from matches. Just shorten them from the sulfur side.

Then its time for gluing: I used both wood/PVA glue - that I recommend, and superglue that bonds faster but its more difficult to work with, and you still need wood gluo later..
After gluing first support you have to tame care for all boards finishing in line on the bottom part of the fence. Fortunately wood glue leaves our a lot of time for fitting.

Now we are going to glue supporting posts, and glue whole section to the base. I do it in one step - glue is bonding fast enough and I am a bit reckless - but you may wait the fence to cure well before going to this step. Its important to don't glue posts before gluing to the base as they work in this piece of terrain exactly like in nature - they support the fence and decided on its potential tilt to the side. (Technically you could do this now and let it cure safely but it will be much more time and effort consuming.)
So after gluing a little matchstick post to the back spread glue on the whole base.
Then wait a minut or two and just delicately take the fence up and just stick it th the gratitiously smeared in glue base.

Now its time to fit it well. That is why we did not glue post before, after one minute they are glued but are still movable and let you control angle of the fence with gentle movements.
Now wait another minute or so and take whole unit gently and apply sand to the glue at the base... and voila..
Depending on how fast you is setting you might want to use something to keep it straight during the curing process.. I use miniatures with pointy sticks.

Finished fences look like that:

For something that take 10 minutes to do per unit and cost you practically nothing - its very very easy to do its pure win.
They could even work as is without painting - as you see coffee sticks have nice weathered and different colors. Its best to paint sand on the basses though, unless you are going for desert town.
piątek, 23 października 2015

von GRZkoffs best...

My Napoleonic skirmish project is slowly coming forward. I've finished and based unit of Austrian German Line Fusiliers and von GRZkoff himself.
I am not fan of those Victrix Austrian models. They are cheap and fill ranks fast but hunched poses and especially faces left a lot to be desired (who thought that mouldline through the face is good idea Victrix ?!!  They are worse than Frenchmen for sure. Only bonus is mounted colonel sprue in the box. von GRZkoff face is a lightyears ahead of fusilier faces.. In the end they will look good on the table but for my next box i will try my luck with Grenadiers, they have faces cast frontal not on the side.
I really like vonGZKoff face, its one of the most characterful Victrix faces I've seen (my second favorite is first Frenchman in the line on the action photo). I will use second one with some slight hat modification for a French officer. Sorry for lack of eyes but I have to confront the color with real life von GRZkoff first :)


And for the finish action shot (sorry for the void but i lack proper Napoleonic terrain yet :)


poniedziałek, 28 września 2015

Zombies happen..

After my first game of Malifaux we saw a serious flaw in my miniatures collection.. Zombies.. I procured body counters, but they did not stay stiff for long.. Nicodem like them restless and moving.

It happened that my friend had box of Wargames factory zombies lying around that he generously decided to lease to help further Resurectionist case (nice thing to do for a vile Gremlin he is)

The models themselves are.. somewhat lacking.. Seriously if you want good looking zombies to roam your tables avoid them.. But if you need cheap and easily paintable zombies to make a bulk of the horde, or you want to convert all of them then you may take you chance with them, just don't say I haven't warned you :P  Oh and they are on the smallish (25mm to 28 old school) side. And they are very uneven. Thay have some sharp details and yet they have areas of worst casting Ive seen in plastic miniatures. Strange mix and I have mixed feelings about them.
As a stop gap measure before I will get much nicer Victorian zombies from West Wind they will work great.

So after this not very informative review here are my 6 Wargames factory zombies (with extra 3 hats from greenstuff that I havent put enough time into - but i needed them fast). Next 6 will be fully converted and I will see what can be salvaged from this set.
But for now fast and dirty zombies
I won't spoil the effect with detailed photos.

:)

czwartek, 24 września 2015

Pumpkin flavored field

My inspiration of late is Malifaux, i really dig its dark but funny cliche atmosphere, I was struck lately with the lack of horror themed terrain. Fast remedy you can see here (second more funeral part soon). Here is my Sinister pumpkin field - i have to confess that i come up with this idea remembering old computer horror game in Point and click adventure genre I played around 2000 (i completely cannot remember its title now, but great and scary pumpkin field and its weeds made great atmosphere i remember d until today (go figure)

So here is my Sinister Pumpkin Field


3 elements that should give sparse Pumpkin field (I've got 4 loose pumpkin as an obstacles too). More of climatic background than difficult terrain, but hey is give light cover and could impede movement. 
And here is lovely (if not lively unfortunate) assistant zombie prostitute Magdalene
Say hello to Maggie (and don't you dare ever say tell her its from maggots) My first finished Malifaux miniature (she lack yet a few touches on the base and around but really minor details)


Houpfully I will post In action photos of my Sinister Pumpkin field because there is a rumor that vile gremlins will come to steal my pumpkins..

That is very shaky photo from the first visit (Pumpkin were defended but barely !!!)

See you soon maggot Maggie!

czwartek, 17 września 2015

Intermission.. Why you should never let Indars models inside..

My computer crashed.. and it took with him a lot of materials.. so My blog was on small hiatus for two months.. It will reassume shortly, but now this dramatic intermission..

Never let inside your house models belonging to Indar..
And thats why

 This package didn't look suspicious at first..

 But then.. when lights went out tonight, something started to crawl from the inside !!!
 They spread like infestation...
 And found vodka i use for cleaning my brushes !!
 Oh what those dastardly miniatures will do next !!

 And the hell broke..

 First they molested local girls..
 Then beaten senseless all local animals..

I have to go World War 1 on the bastards to contain the problem..


Lesson:

Never let inside models belonging to Indar..never..
Related Posts Plugin for WordPress, Blogger...